Every company, from corporations to small businesses, relies on its brand identity design to represent its services to the customers in a unique way. In this tutorial, you will learn how to use LogotypeMaker’s editor to create a beautiful and unique custom logo.
Step 1
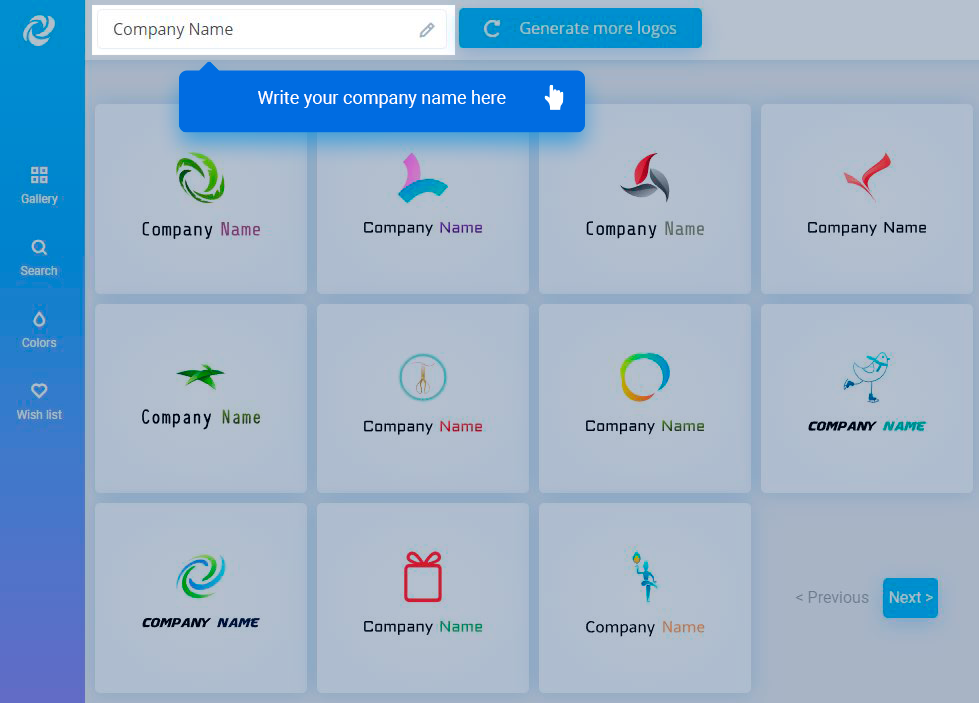
After pressing “Make a logo” button on the landing page, you will get on Logo Generator page.
In the input box write your company name and hit Enter.
Step 2
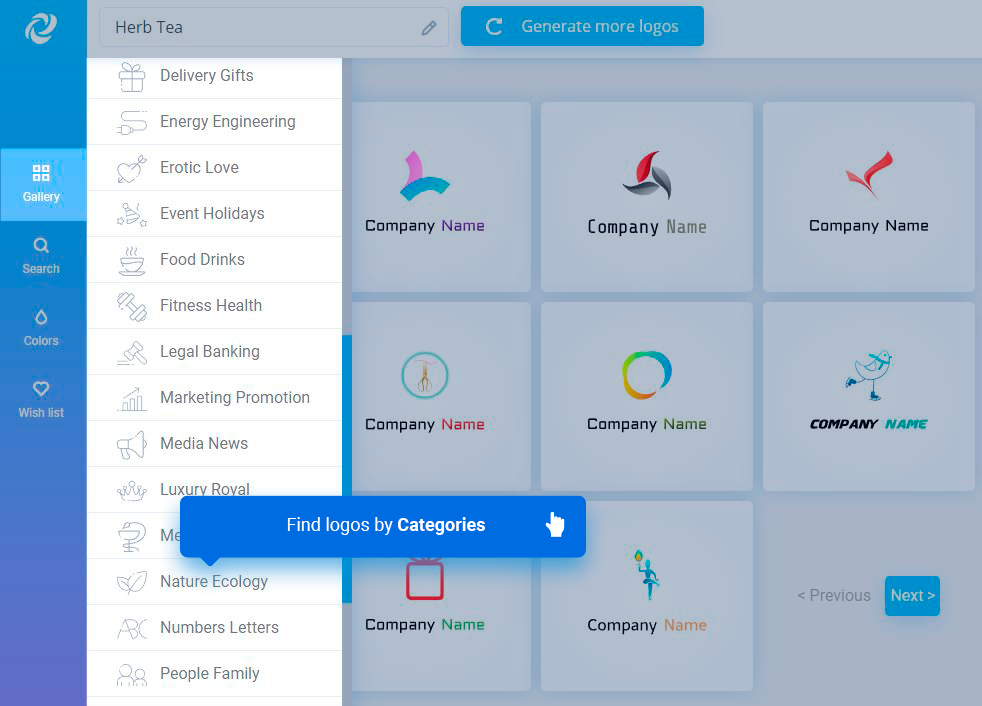
Below you will see a list of logos that are generated randomly. Search for logos by pressing “Generate more logos” button to refresh the list or click the “Category” menu in the top left. Let’s choose “Nature Ecology” category.
Step 3
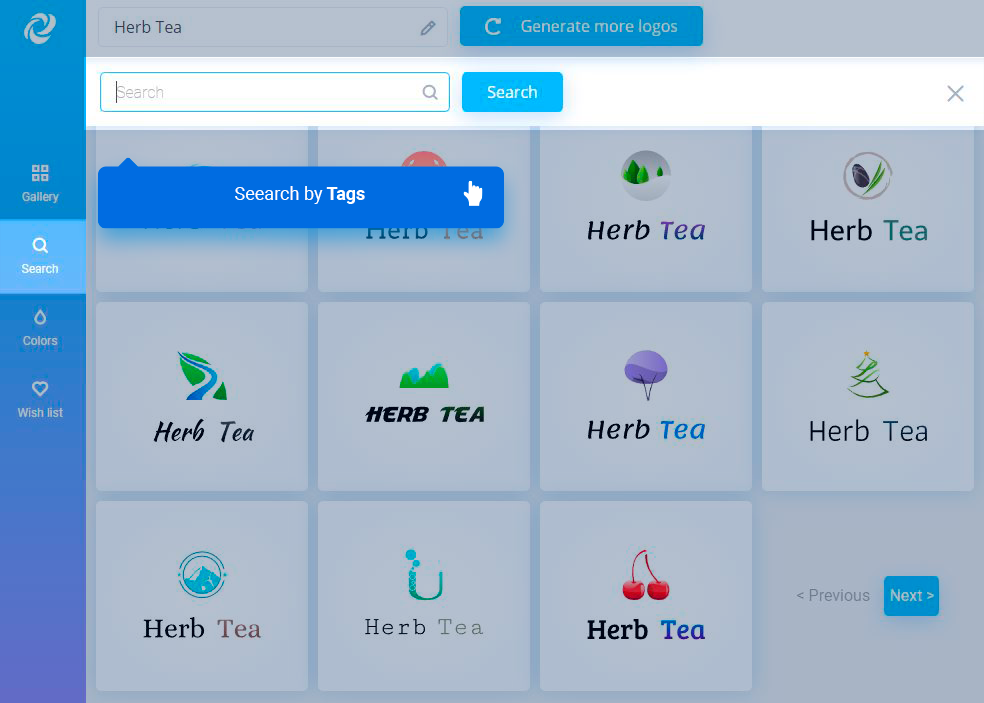
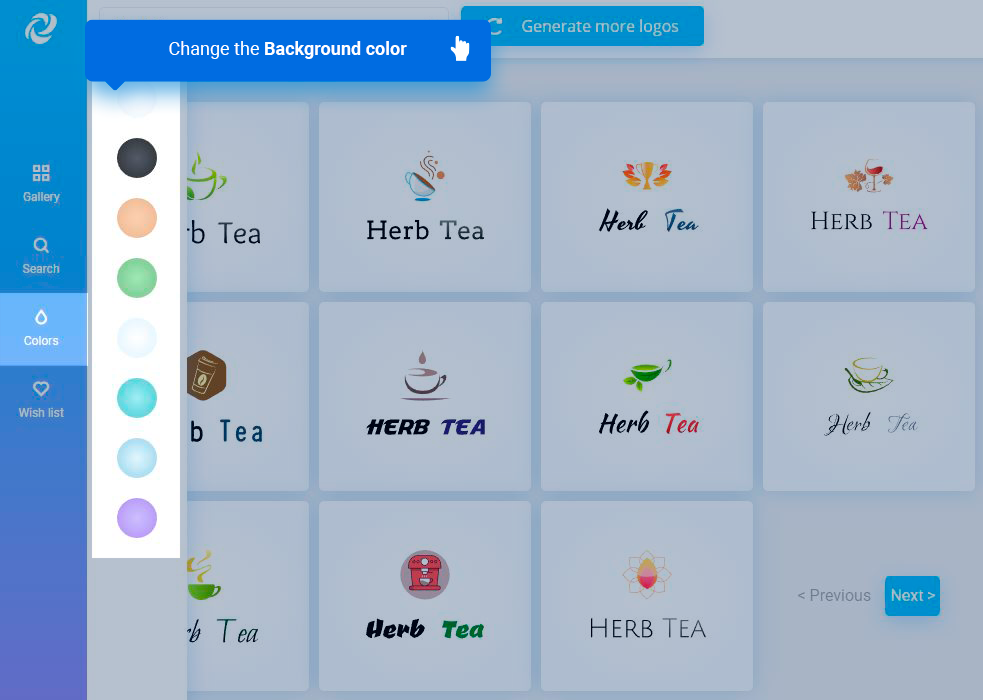
LogotypeMaker has also great options to help you find what you are looking for. In the top menu there is the search box and a ready gradient color palette for the background.
Step 4
Click on the selected logo to edit or you can save it in the wish list and search for more logos.

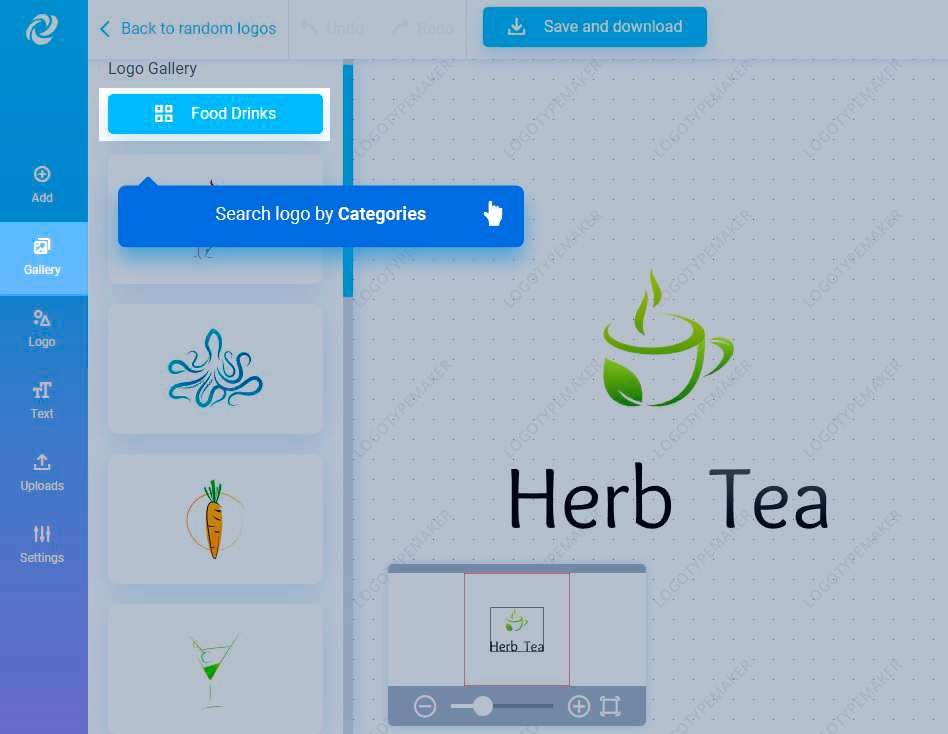
Step 5
Once you clicked on “Select & Edit” button, the logo will open in LogotypeMaker editor where you can customize every shape and element. If you are not sure you’ve chosen the right logo, you can always open the gallery inside the editor and replace it. Use the drop-down menu to sort logos by category, or choose “All” to view all.
Step 6
To undo or redo an operation, use these buttons in the top menu. This option will give more freedom to experiment in the design process.
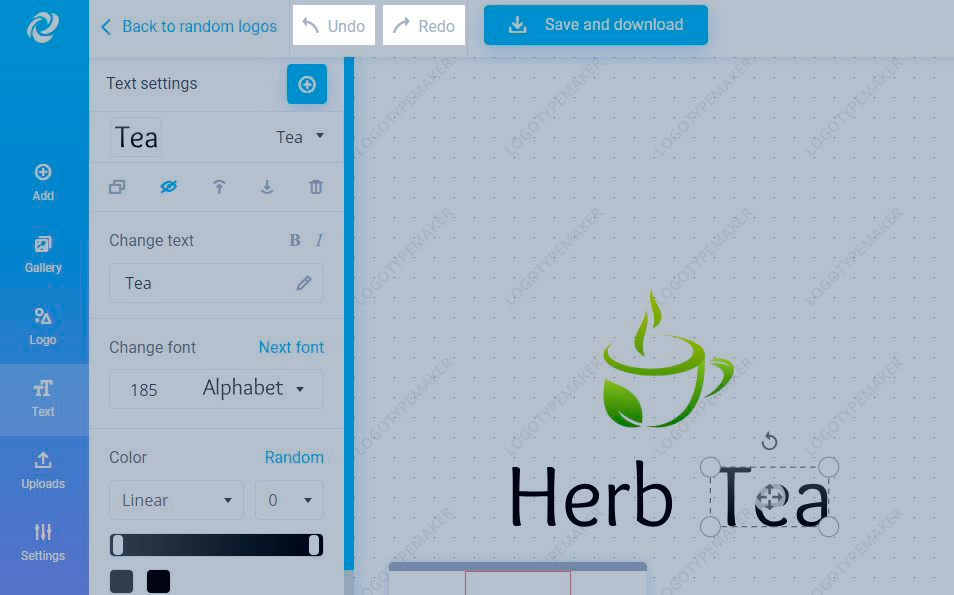
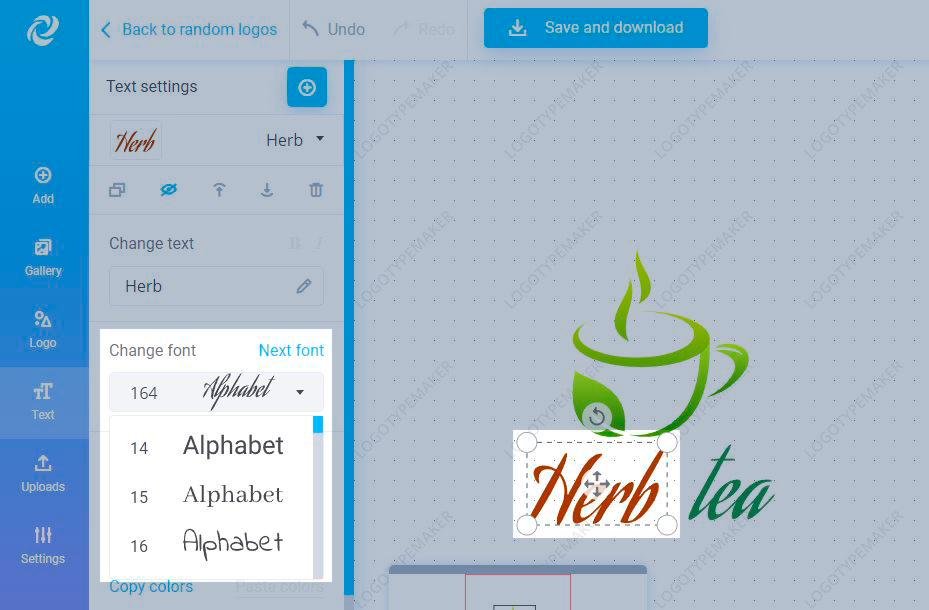
Step 7
Now, let’s change the font. Click directly on the text “Herb” to edit and in the drop-down section select a font that you like.
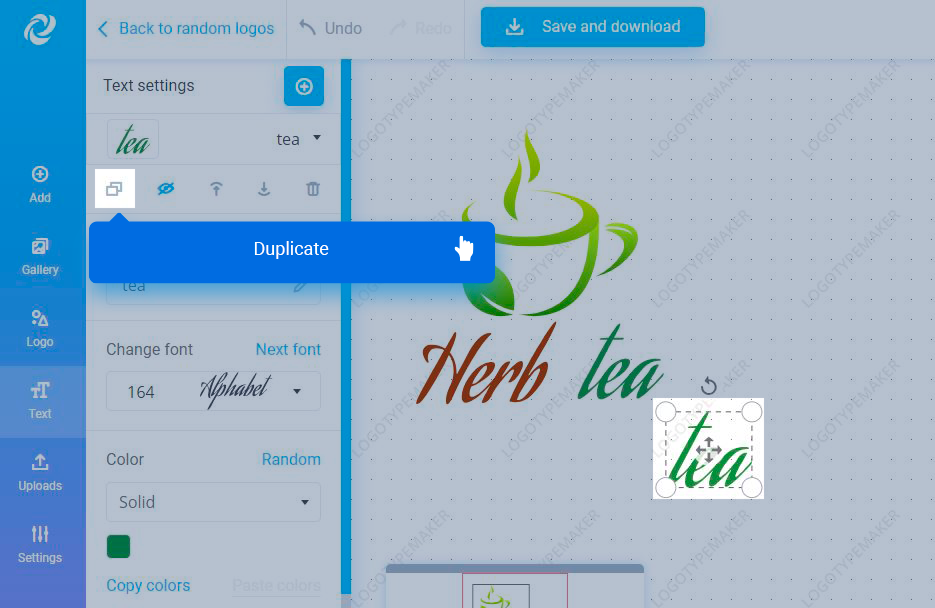
Step 8
Above the font preview you’ll see 5 more round buttons (from left to right): duplicate, visible, layer up, layer down and delete. These options are also available for every element of the logo: for text, logo shapes and icons. To duplicate, click on the text “tea” and then click on “duplicate” round button.
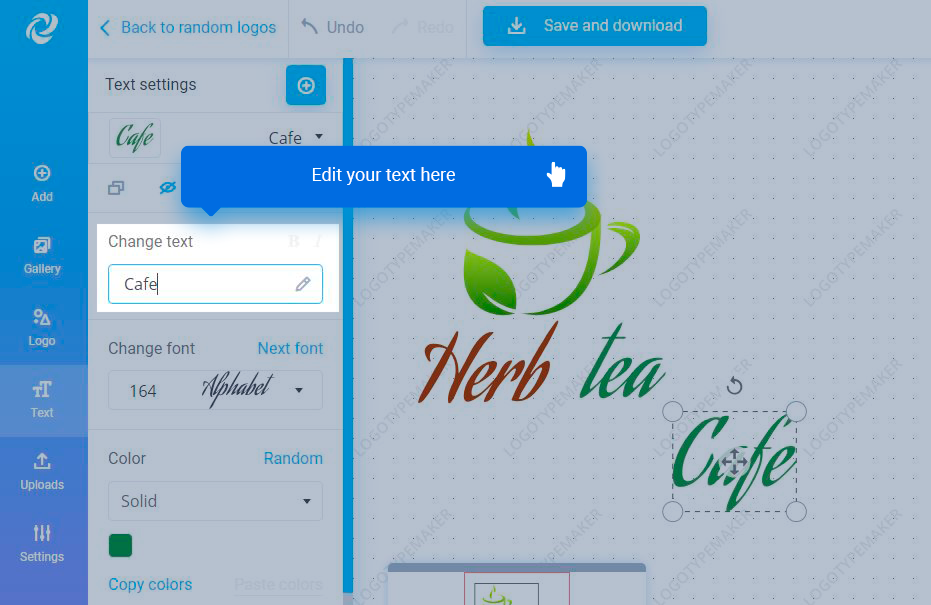
Step 9
Next, let’s edit the text we just duplicated. It’s very easy. Just click on “tea” and change it to “Cafe” in the input field (see the image below). Then drag and place it where you prefer.
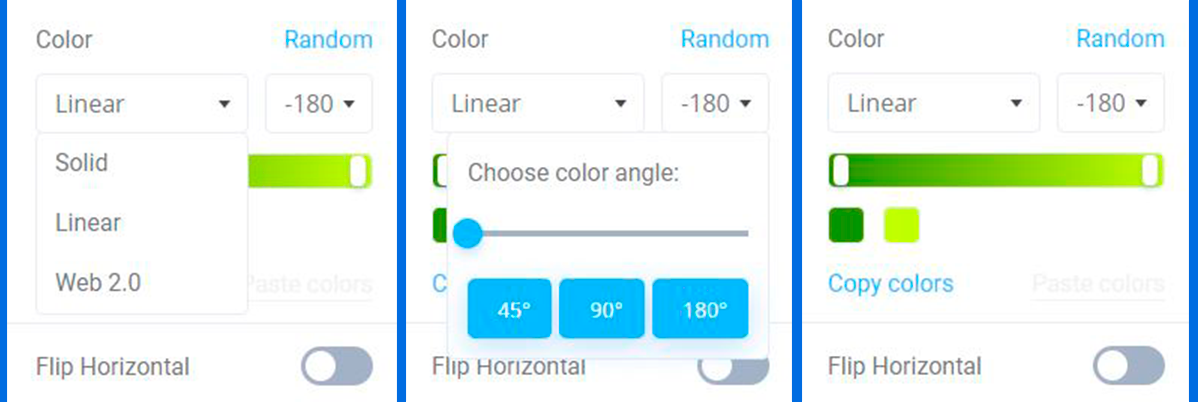
Step 10
You can set your own advanced color options. Select “Linear” for the gradient and replace the default angle to 90. Also, there is a random color button and if you press it a few times and it will change automatically the color gradient.
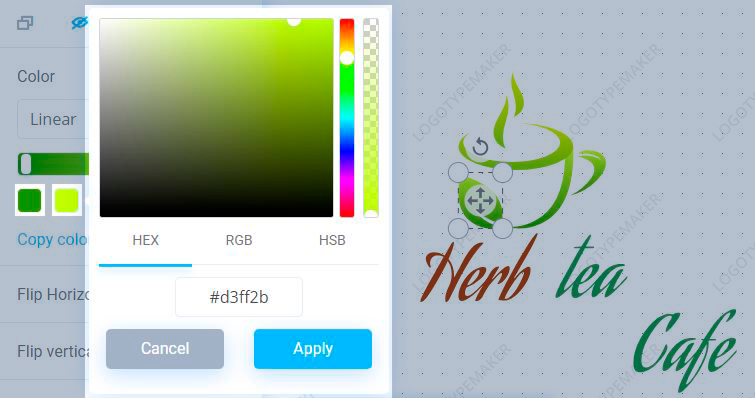
Step 11
Click directly on the “color drop”, then in the color picker box select a color and press “Apply”. Repeat the same steps for the second “color drop”. The green gradient colors: from #559506 to #b6d739.
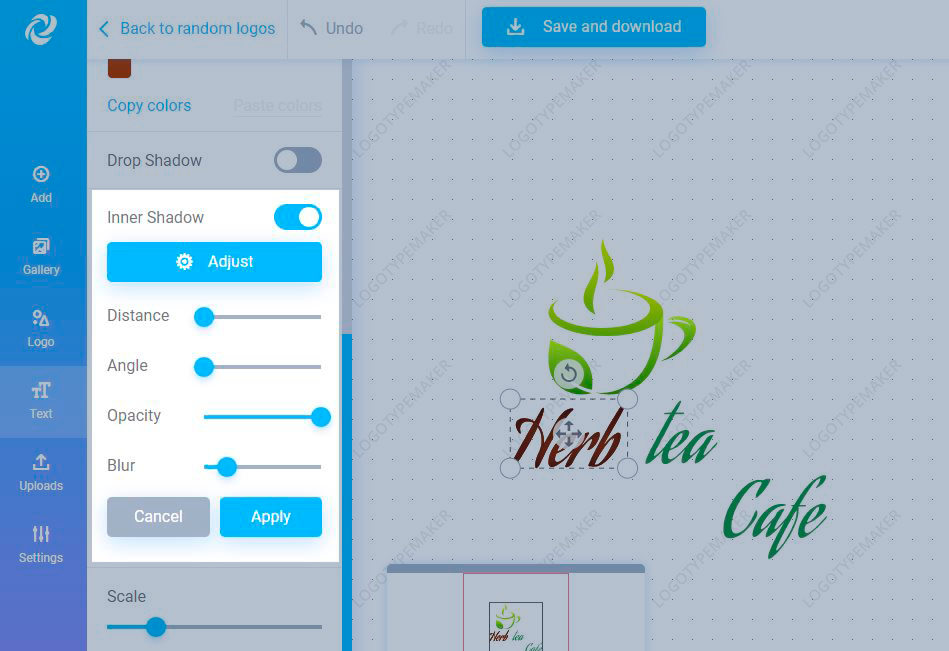
Step 12
Let’s make a trendy cutout effect for the text. Click on the Inner shadow switcher and then on the “Adjust” button. In the settings box, move the Opacity slider to the left to make it less darker. Apply the same effect for “tea” and “Cafe” texts.
Step 13
To make this logo unique, we need to personalize it. Click directly on the logo, then take an anchor point and drag the anchor to make it smaller. On the left, select the layer that contains the leaf to customize it.
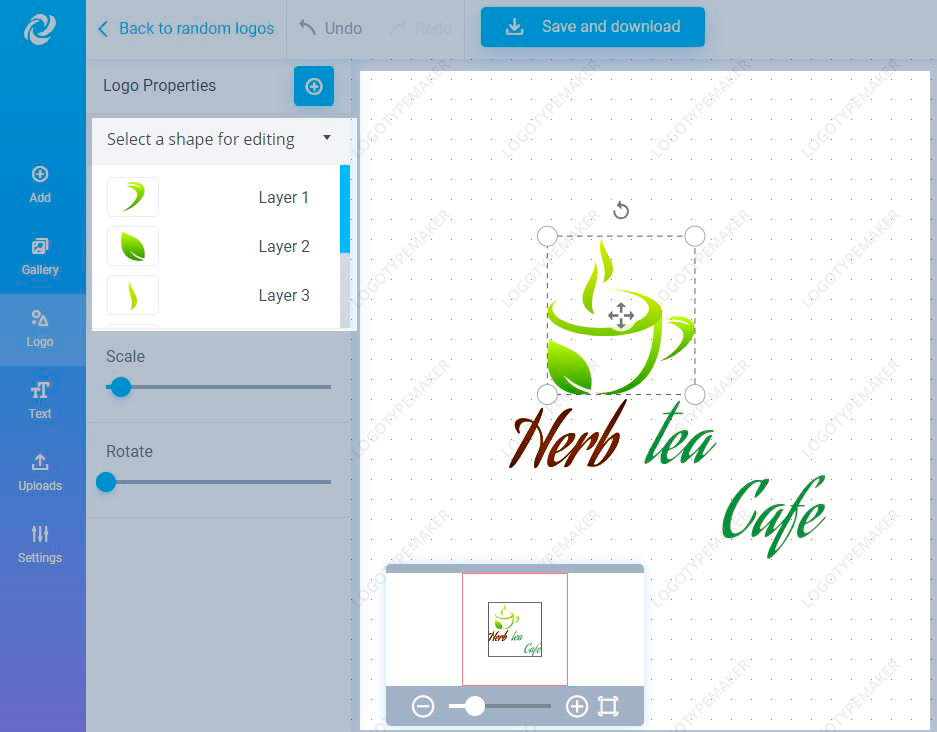
Step 14
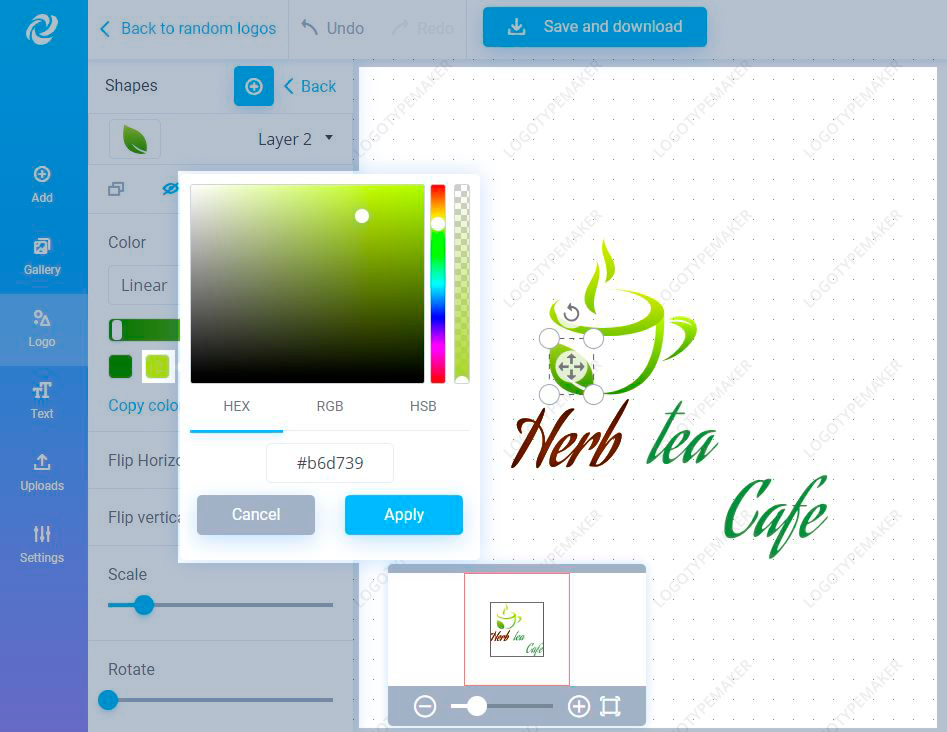
To fill the leaf with the new green gradient (from #559506 to #b6d739) click on the color drop, then in the color picker select a new color.
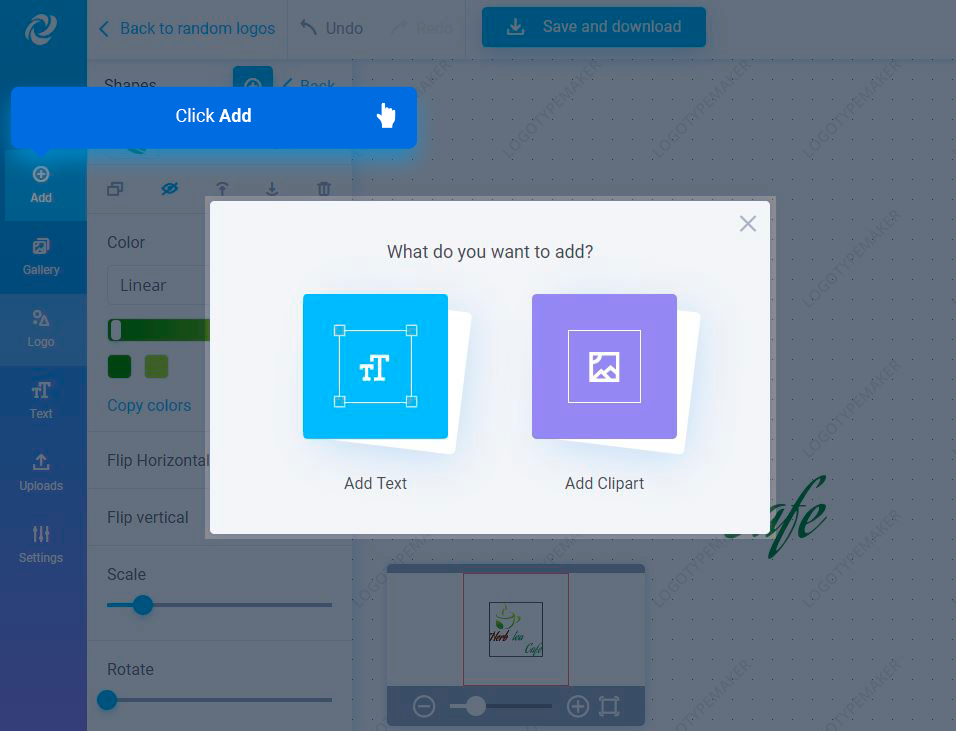
Step 15
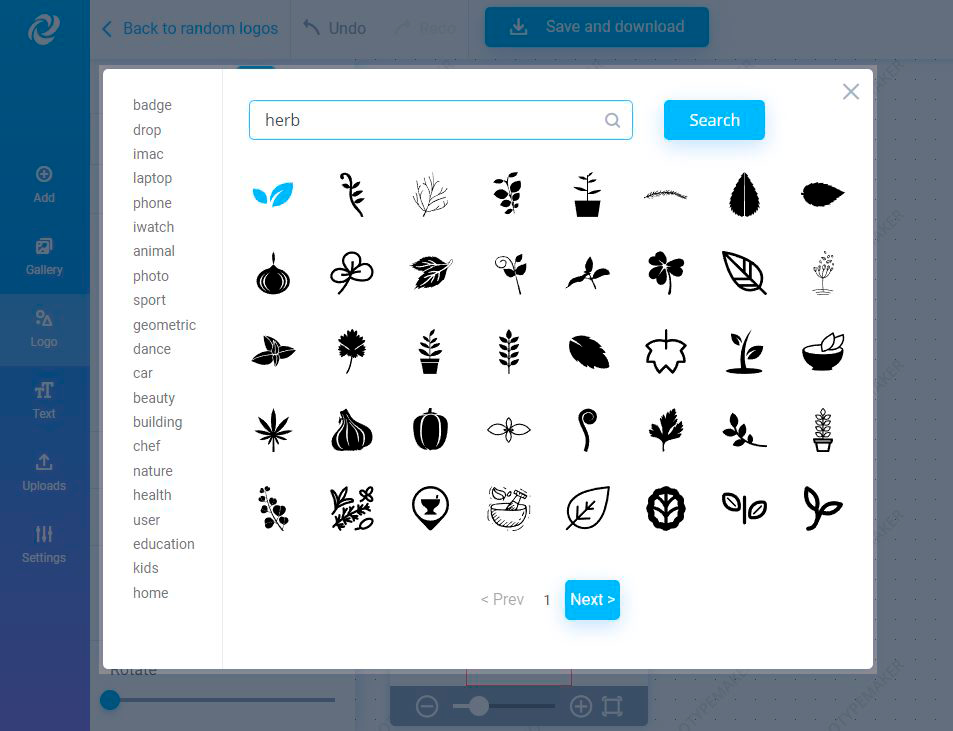
Go back to the Gallery tab and click on “Add Cliparts” button to open the clipart page. Write in the search box “herb” and press Enter. Select the first icon.
Step 16
Once you selected your icon, it will appear black on the canvas. You can resize it and change its colors to match the logo.

Step 17
To make the logo more interesting, we’ll upload an image and make it a textured background. Click on the “Uploads” tab, then on “Upload” button and choose an image for your computer.
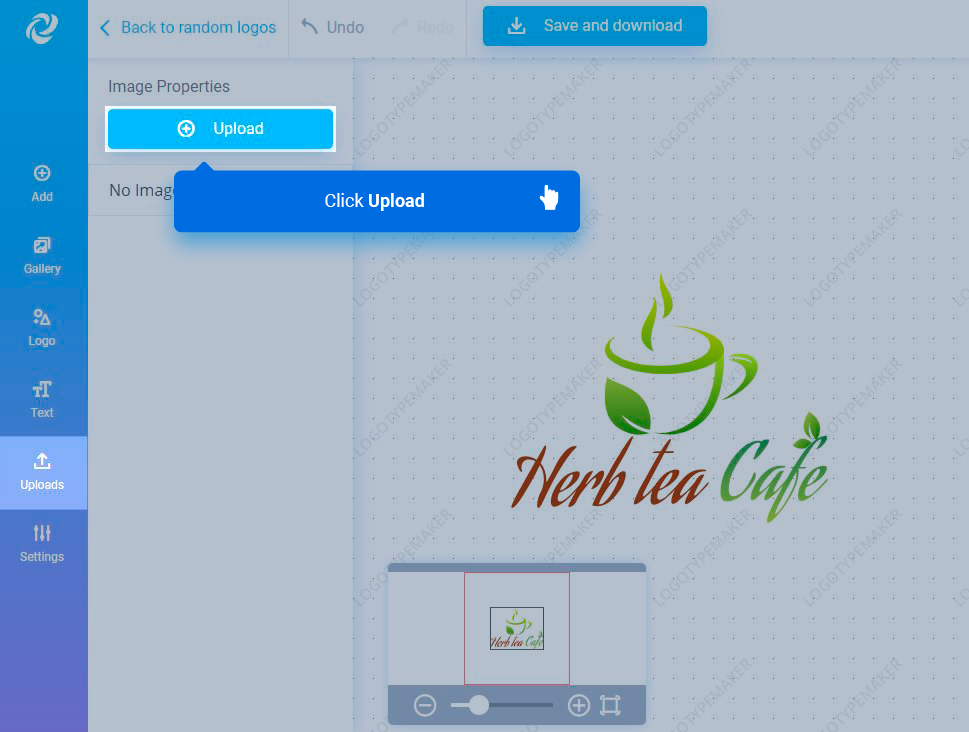
Step 18
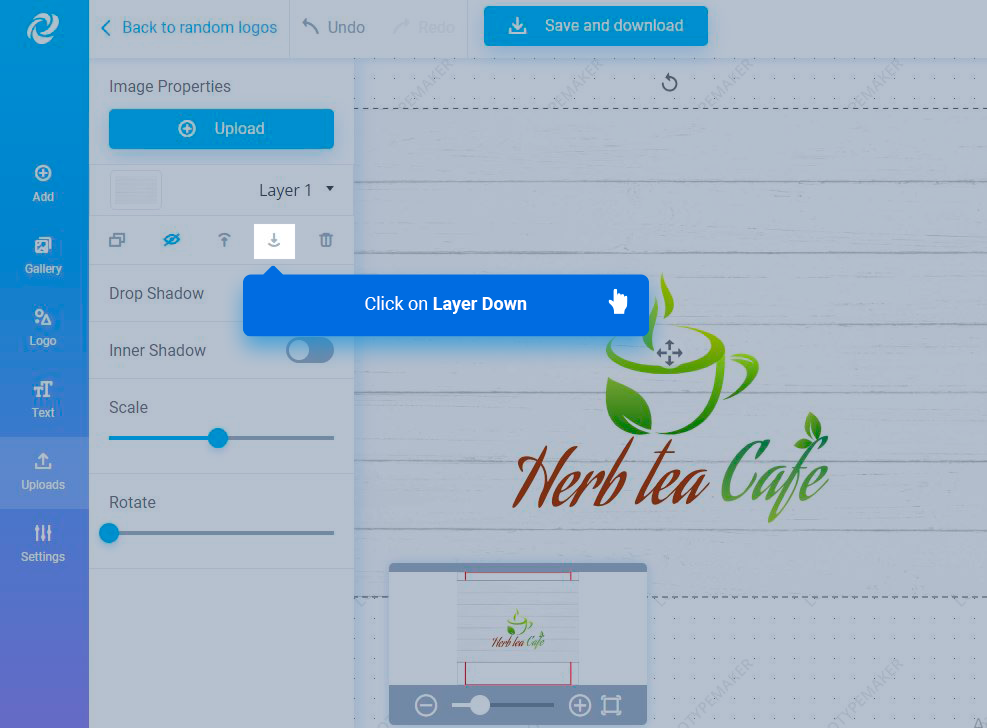
To make the uploaded image underneath the logo and the text, click on “Layer down” button.
This is the final result! I hope you’ve enjoyed going through this tutorial and discovered something new. Good luck!